FinOps as Code: Automating Cloud Costs with Pulumi
Use FinOps as Code to create your cloud cost infrastructure with Pulumi.
In previous FinOps as Code explorations, we introduced how you can apply Infrastructure as Code (IaC) techniques to the FinOps world. We walked through several FinOps use cases, showcasing how Terraform can automate and optimize cloud financial operations.
For practitioners who want to expand their FinOps as Code toolkit even further, enter Pulumi—a versatile IaC platform that functions as both a declarative and imperative tool using familiar programming languages. This blog will discuss some differences between Pulumi and Terraform, as well as provide an overview into how to use Pulumi from a FinOps as Code lens.
Pulumi: Getting Started
Pulumi is an open-source IaC tool that lets you define and deploy cloud infrastructure using familiar programming languages, like Python, TypeScript, Java, Go, C#, and others. You can use fundamental programming constructs in your infrastructure definitions, such as loops, conditionals, and functions. You can also create a desired infrastructure using both imperative (explicitly use code for each step) and declarative (describe the desired end state) approaches. Pulumi is cloud-agnostic, and you can create configurations for multiple cloud providers in a single Pulumi program.
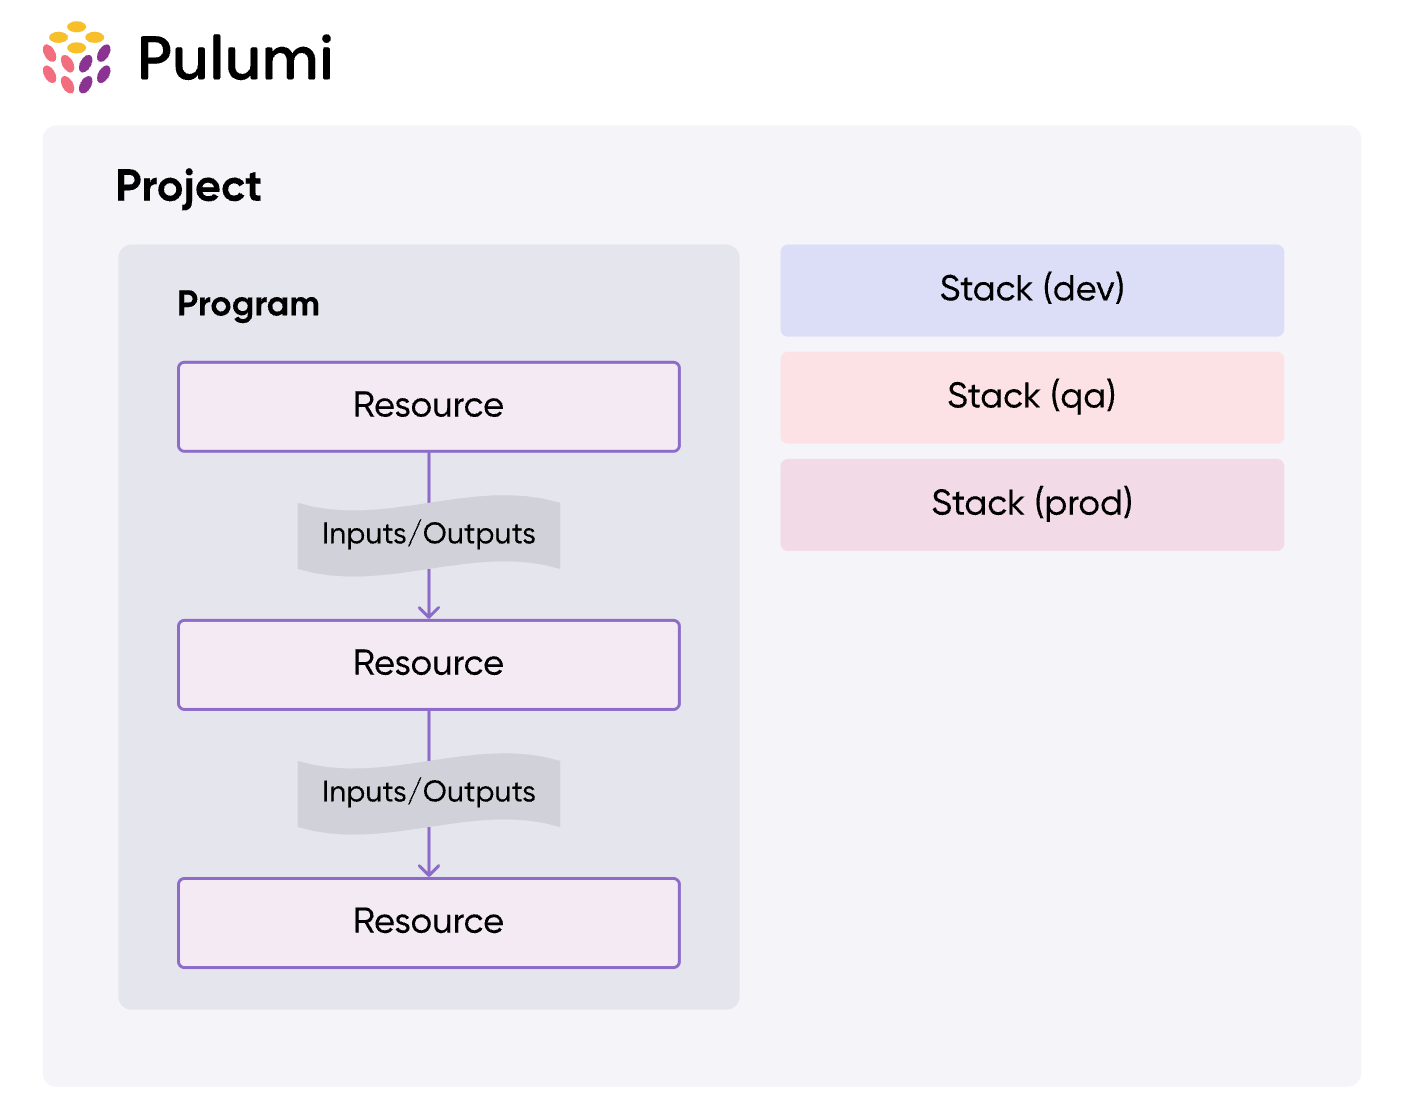
To get started with Pulumi, install the Pulumi CLI and configure your language runtime, as well as any required access credentials. The Pulumi architecture consists of projects—or the directory that contains the source code. Projects contain programs—or the directions for how to create your infrastructure. Use the Pulumi CLI to create a stack—or an instance of your program.
Pulumi vs. Terraform: Comparing IaC Options
Visit any DevOps or IaC-related forum, and you'll most likely come across a Terraform vs. Pulumi debate. Commenters will often focus on how Pulumi doesn't require you to learn a domain-specific language (DSL), unlike Terraform, which typically uses HashiCorp Configuration Language (HCL).
The table below provides a high-level feature comparison of the two tools and is not meant to be an exhaustive comparison. Ultimately, tool choice comes down to personal preference, team preferences, or project-specific requirements.
Comparing IaC options with Pulumi vs. Terraform
FinOps as Code with Pulumi
Pulumi is well suited for cloud cost optimization and FinOps, offering compatibility for all major clouds providers. Pulumi also offers an open-source Policy as Code product called CrossGuard, which helps organizations to maintain best practices and safeguards when creating infrastructure. For example, CrossGuard can enforce resource tagging rules to ensure cloud costs are appropriately allocated to the right department. FinOps practitioners can use Pulumi templates to get started and ensure infrastructure is defined in line with their organization's financial standards.
The Pulumi integration with Vantage also provides another way for practitioners to further enhance their FinOps as Code process. In the following example, we’ll use the Vantage provider, on the Pulumi Registry, to demo a simplified workflow and architecture for a Marketing department that uses AWS and Snowflake.
Note: You can find all demo files on the FinOps as Code repository.
Prerequisites
Before you use the Vantage Pulumi provider, you'll need a Vantage API token.
-
Store your API token as an environment variable with:
export VANTAGE_API_TOKEN=<YOUR_TOKEN>. -
Export the Vantage API host with:
export VANTAGE_API_HOST="https://api.vantage.sh". -
A Vantage account with at least one connected integration.
You also need to download and install Pulumi, if you have not already, and get a free Pulumi Cloud account to manage your infrastructure state and secrets.
Step 1: Install Packages and Credentials
Note: For continuity, the following demo mirrors our first FinOps as Code demo with Terraform and creates the same final cost reporting infrastructure.
Create a directory for your project, then create the Pulumi directory structure. We'll use Python as the language of choice for this demo.
You'll be directed through a series of prompts that asks you to name your project and stack and select a toolchain for installing dependencies.
Pulumi will create the follow directory structure. The code will go in __main.py__. All the other files are maintained in the configuration details.
Generate the Vantage provider as a local package.
Obtain your workspace's token from the /workspaces Vantage API endpoint. (You can also obtain this token from the Workspaces screen in the console.) Configure your Vantage workspace token as a Pulumi secret:
The goal of this walkthrough will be to create a final dashboard that shows a hypothetical Marketing team’s Snowflake and AWS costs from the past six months, grouped by month.
Step 2: Import Packages and Define Variables
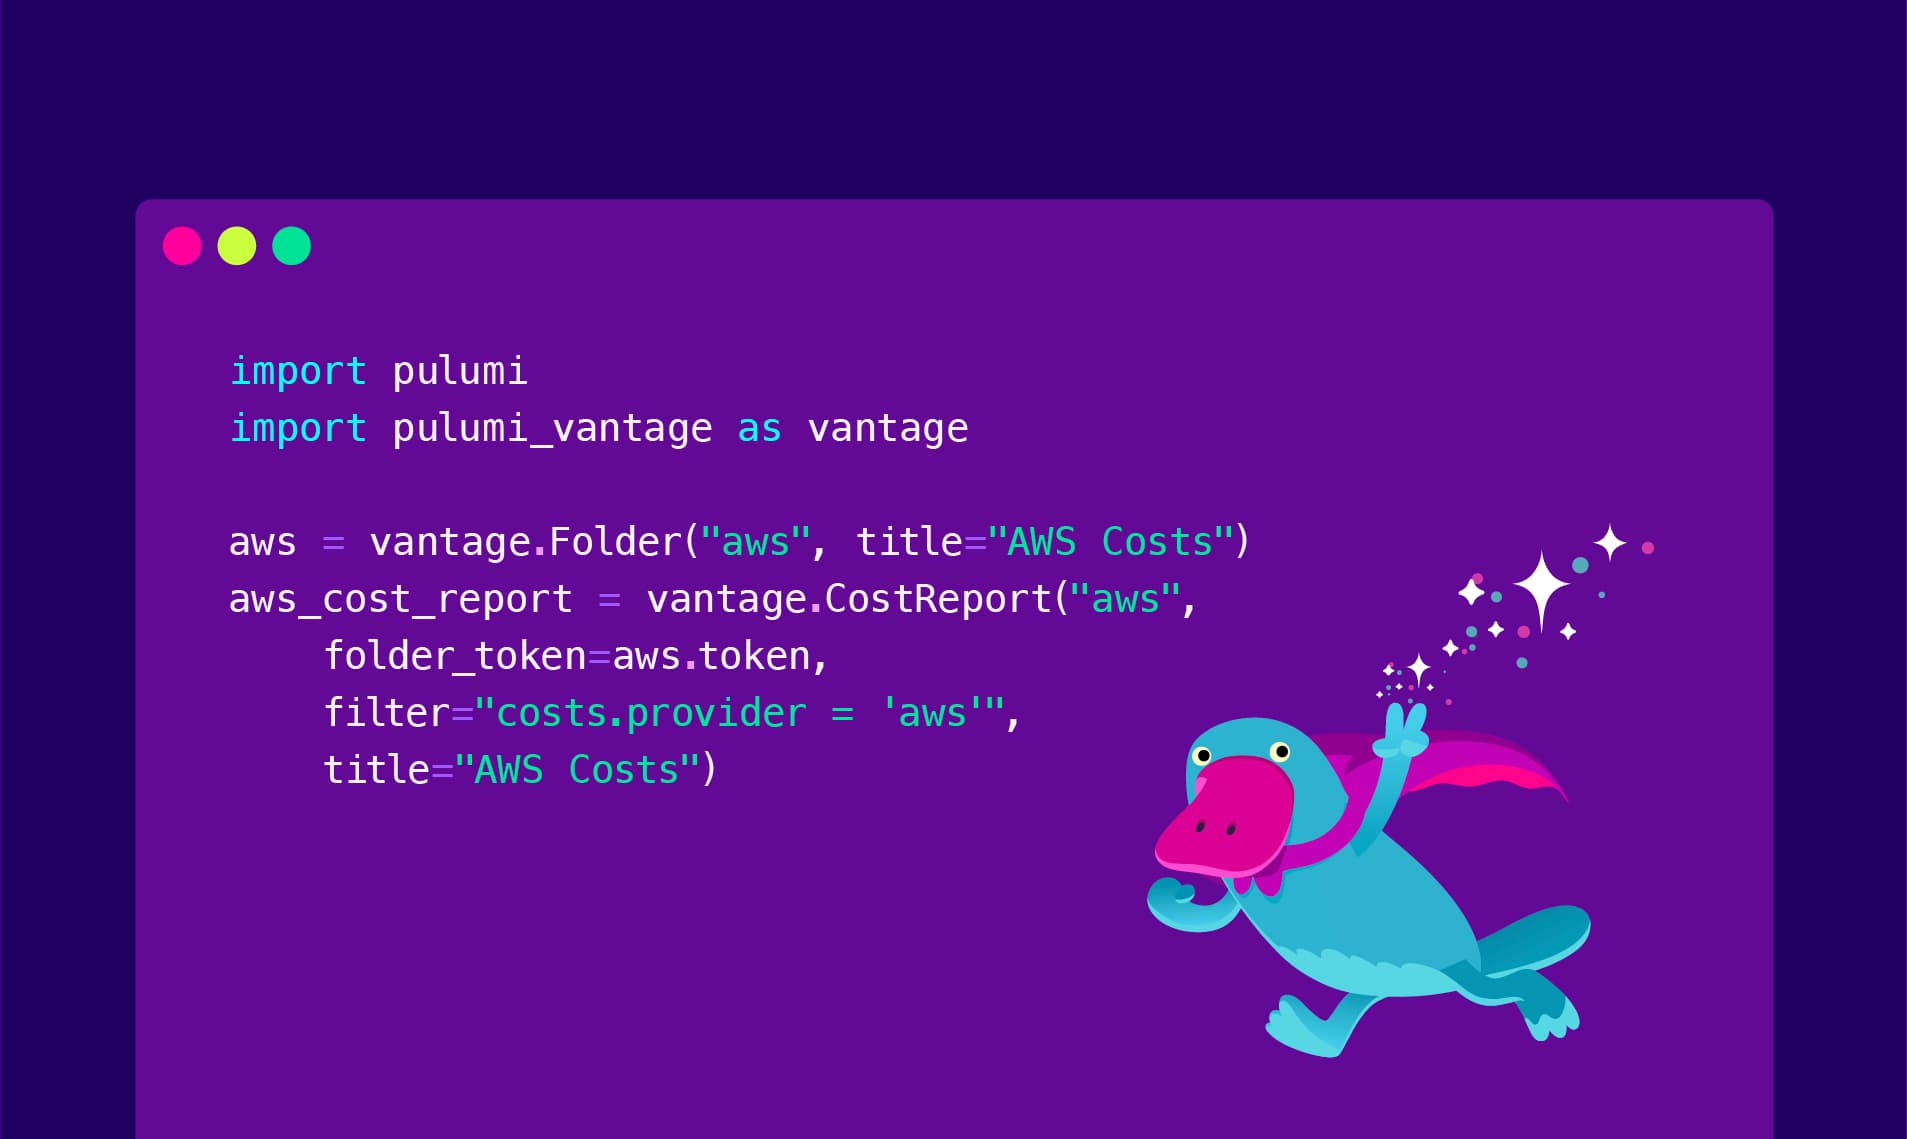
Within __main.py__, import the pulumi and pulumi_vantage packages. Import the secret you created for the workspace token.
Step 3: Create an Outline of Your Cost Reporting Structure
Next, we'll create what we want our cost reporting structure to look like. The structure will include:
-
Two Vantage folders—one for each cost provider—AWS and Snowflake
-
Two saved filters
-
Two Cost Reports that'll go in the corresponding folders and use the corresponding saved filters
Create the report_structure list of dictionaries to consolidate the values for all Vantage resource names.
Step 4: Define Functions to Create the Cost Reporting Structure
The create_cost_structure function will create the folders, saved filters, and Cost Reports. It uses the vantage.Folder, vantage.SavedFilter, and vantage.CostReport resources from the Pulumi provider. We'll populate each input with the predefined report_structure dictionary values within the list. Once deployed, each resource will be assigned a logical ID that we can use to reference in other functions (i.e., vantage.CostReport("{}Report".format(provider) will translate to snowflakeReport).
Use format strings as placeholders for the provider values. Note that the filter input of the vantage.SavedFilter resource uses VQL—or Vantage Query Language—to create the corresponding filter. The function also uses the chart_type and date_bin parameters to specify specific settings for the final reports.
Step 5: Iterate Through Reporting Structure and Create a Dashboard
Finally, we'll call the create_cost_structure function and iterate through the report_structure list for each provider. The reports list will collect the token that Pulumi generates once each Cost Report is created. You can use this token in other resources. We’ll reference it in the widgetable_token variable so that both resulting Cost Reports are added to the dashboard.
Step 6: Deploy Your Infrastructure
Deployments are very straightforward in Pulumi. When you are ready to deploy, run pulumi up. You'll be prompted to confirm the update.
Note: You can run
pulumi previewif you want to just see a preview of the resources that'll be created without actually deploying the infrastructure.
Once deployed, you'll have a dashboard with two reports, each stored in the corresponding cost provider's folder and preconfigured with their corresponding saved filter.
Final cloud cost architecture in Vantage
Conclusion
Pulumi expands the FinOps as Code toolkit with flexible, multi-language IaC management. With the Vantage Pulumi provider, you can easily integrate cost reporting into your existing workflows and ensure financial accountability across all your cloud environments.
Sign up for a free trial.
Get started with tracking your cloud costs.